Around this time of year, photographers who blog like to post some of their favorite images from the last year. It’s really fun because you get to look back, revisit all the amazing people you got to meet while reminiscing over how much you’ve grown as a documenter and an artist.
I’d like to do the same thing but with a twist. Starting today, I want to share 3-5 photos from throughout 2010 and talk about the specs behind the photo. So if you’re interested in where the shot was taken, what time of day, the shutter speed, the post-processing method… I’m gonna share it. I’ve never done this before and you’ll have to bare with me. But I’m hoping it’s informative and helpful to all the dreamers out there who love photography and have the passion and drive to make beautiful art.

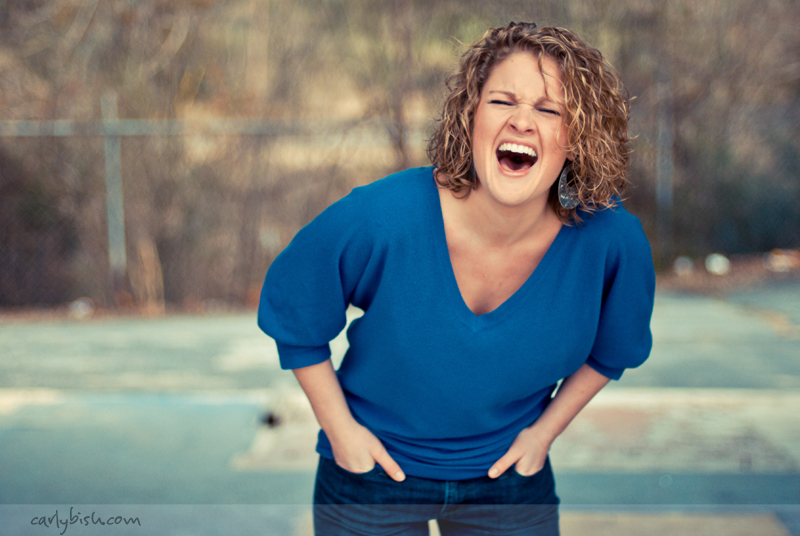
Julie, 01.11.2010
Specs: Nikon D80, 50mm, ISO 100, f1.4, 1/640sec
Making the Image: This was my first session of the year. Julie is a theater major and needed headshots to audition for local theaters. It was January so obviously, it was pretty cold.
Post-Processing: In Lightroom, I warmed the temp to counter the cold nature of the shoot itself. I also wanted Julie’s skin to be more “flesh” tone and not so translucent. So in the “HSL/Color/Grayscale” tab, I knocked down the saturation and luminosity of my Red and Orange by about -8. After that, I did a quick web sharpen in Photoshop.
It’s a 2010 favorite because… I love Julie’s ability to laugh and from the gut. I can’t even remember what I said here but Julie’s reaction was priceless!

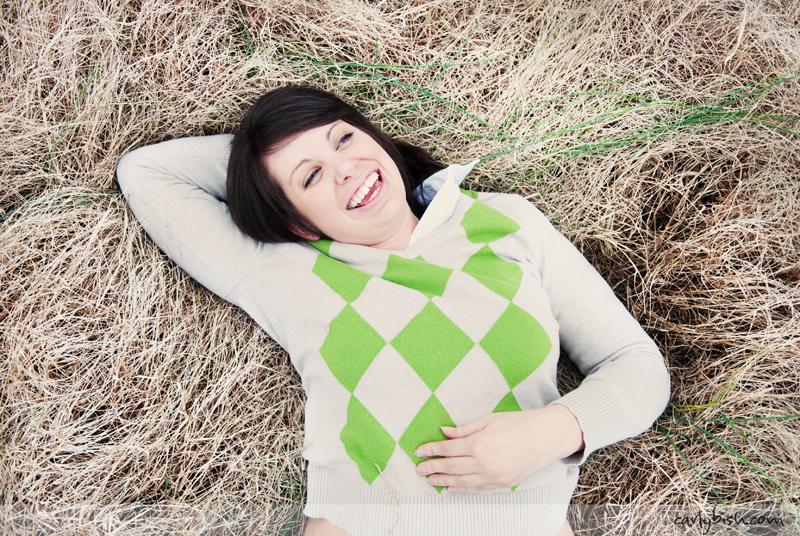
Stephanie, 01.16.2010
Specs: Nikon D80, 17-55mm, 19mm, ISO 250, f2.8, 1/800sec
Making the Image: This was taken on my birthday. I was staying with Stephanie in Nashville because I had just gone to Justin&Mary Marantz’s Spread the Love Workshop and a couple days after that, my brother was flying into the Nashville airport. So during my stay, Stephanie and I ventured out with her basset hound puppy, Lucy, for a mini photo session.
Post-Processing: In Lightroom, I increased the exposure by +0.38. Then I increased the blacks by 25. Skin tones are always big for me. I always want them to be “fleshy”. So in this photo, I took the Red’s saturation down -12 and upped it’s luminosity by +8. I also decreased the Orange’s saturation by -8 and luminosity went up +8. Generally, I do this to most of my photos. Another web sharpen in Photoshop. Done.
It’s a 2010 favorite because… Stephanie’s eyes. They reveal her true nature and spirit which is kind, generous, and beautiful. I also love the contrast of her hair against the wheat grass where she’s resting and the all around happy feeling I get from looking at it.

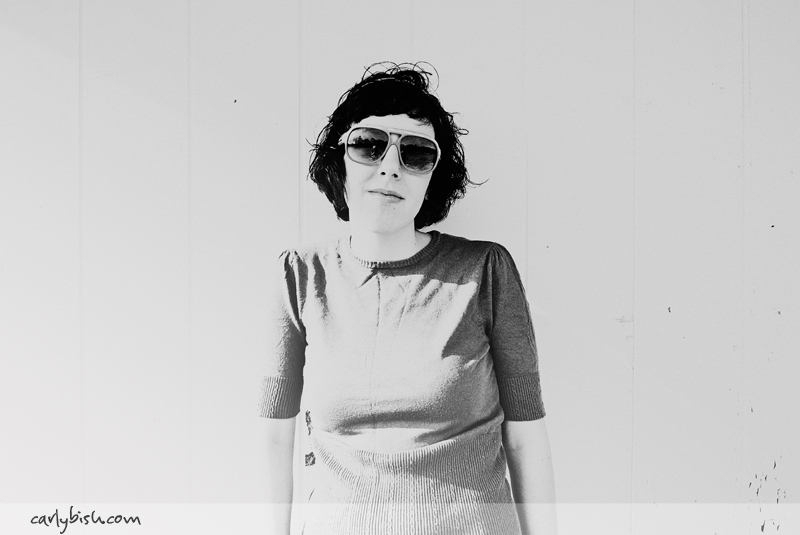
Amanda, 01.23.2010
Specs: Nikon D80, 17-55mm, 17mm, ISO 200, f2.8, 1/1000sec
Making the Image: Amanda and I got together on an irregularly warm January day for this shoot. We also shot fairly early in the afternoon, so the sun was sitting pretty high in the sky (not my favorite time to shoot). So we had a fun time finding nicely shaded spots. When we found this wood shack, I noticed the angle the roof’s shadow was casting across the side of the shack’s white wall, which was a near perfect 45 degree angle. I had Amanda stand exactly where the shadow split her down the middle. The lighting ended up being very fashionable and flattering.
Post-Processing: This image is a little different than the previous two. After basic corrections in Lightroom (exposure, contrast, white balance, etc.), I opened it up in Photoshop. At the time, I was trying out Totally Rad‘s Demo Actions, which had an action called “In Faux Red (B&W),” which converts the photo to grayscale and adds “grain.” I didn’t really like the black and white conversion itself, so I converted it to my own personal B&W version and then used the “In Faux Red (B&W)” action for the grain. It’s a really intense action, so I took the opacity down to about 20-30%. I also used the eraser tool at about 10% opacity to erase even more grain away from Amanda’s face. I loved the look of the grain on the wood background but not so much on Amanda’s face. I really liked how the image came out but since switching to Alien Skin’s Exposure 3, I don’t use any of the TRAs.
It’s a 2010 favorite because… Amanda is very geeky-chic and I thought this captured who she is perfectly. I love the negative space surrounding her, her pose, expression, her glasses… It feels iconic to me. I don’t see myself ever getting tired of this photo. Every time I see it, I feel happy.

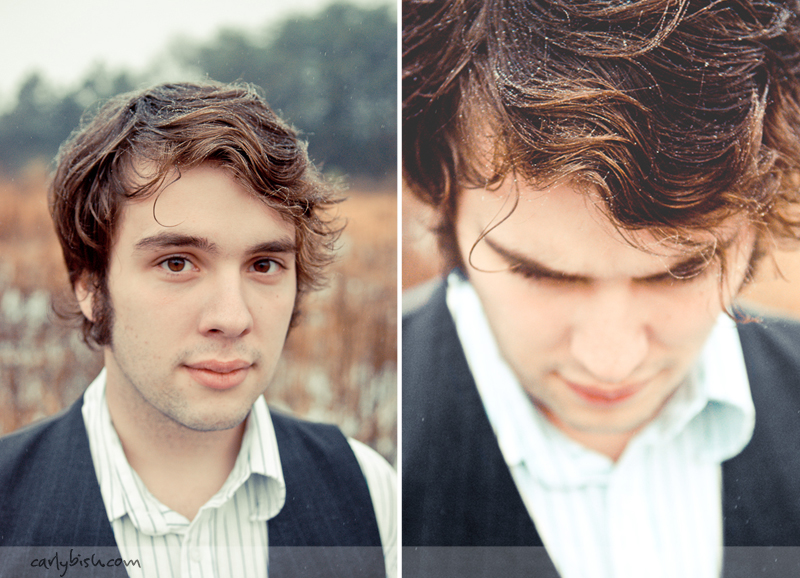
Dave, 01.30.2010
Specs: (Left Photo) Nikon D80, 17-55mm, 34mm, ISO 400, f2.8, 1/800sec. (Right Photo) Nikon D80, 17-55mm, 55mm, ISO 400, f2.8, 1/800sec.
Making the Image: Funny how we went from a relatively warm day with Amanda to a snowy day with Dave! I was lucky enough to have Dave as a neighbor in our apartment, so getting together was easy. And even though it was really misty out and there was snow on the ground from the day before, we decided to venture out anyway for some pretty nift photos. Dave has a definite uniqueness to his personality and to his look. I had a great time just conversing with him and being in the same space as his genius. He’s a writer, an artist, and a really nice guy. Taking his photo was second nature.
Post-Processing: This was during what I call my “Presets Era” in Lightroom. I had gobs of presets that I had either developed or downloaded free from other places (see Presets Heaven). I can’t truly recall what this preset is called, but I can tell you that desaturating is involved. Just by looking at the images, I know the Orange’s saturation was knocked down a good bit and the luminosity taken up, giving Dave that creamy skin tone. I think the reds were mostly left alone because they effect so much of the photo (lots of reds in Dave’s eyes and in the field behind him). I also remember lowering the Blue’s saturation significantly because even though Dave’s vest was gray, it came out looking bluer than it should have been. After all that was done in Lightroom, a quick web sharpen in Photoshop and done!
It’s a 2010 favorite because… I realize there are two photos here but I was a fan of this whole series. When we spotted this field with stiff blades of grass and weeds, the snowy mist was really adding a lot to the atmosphere. I tried to capture that feel by focusing on as much of the detail as I could, like the tiny beads of water accenting Dave’s wavy, naturally highlighted locks (jealous, much?). I just think the whole session was magical.
SUMMARY: Taking pictures of people one-on-one is definitely one of my favorite things to do. I love getting to know the people I’m photographing, opening up to them, hearing their passions and sharing my own. For me, a huge part of 2010 was getting to know people in a way that encouraged their dreams and the deepest desires of their heart. Simply taking their photograph was my way of sharing my own deepest love. As hard as it is to run and grow my own business, I would much rather struggle and fight for every bit of what I do then work a job that bores me to death or worse, steals time away from what I love to do more than anything else.
As far as technicality goes, it’s interesting to note certain trends in the above photographs. As you can tell, I like to use as much natural light as possible, keeping to the lowest ISO settings and widest apertures. That’s definitely with purpose and intention. I shoot in full manual mode because I have to have control over all my settings. So I encourage you to take a leap in learning, switch your camera over to Manual, and start testing things out. Check your ISO settings (I just recently helped my friend with her camera and she had no idea that her ISO setting was permanently set to 3400!) , open your aperture as wide as it will go (even if that’s only to f3.5-4.0), go outside, adjust your shutter speed, and see what happens. Ask a friend to be your subject and see what you can capture.
2011 is gonna be about NO FEAR for me. About taking risks, giving it 100,000,000%, and doing things I’ve never tried before. I encourage you to do the same.
If you have questions about any of the above photos, please feel free to ask them in the comments or email me at carly@carlybish.com with the subject line “Photo Question.”
Stay tuned for tomorrow’s post where I’ll be sharing photos from a wedding I helped shoot in September! I am SO excited for you to see these!


1 Comment
ACE post Carly, love a bit of behind the scenes action. I am gonna try your skin-tone adjustments too as that’s often a tricky element to master. You do it beautifully!